🚀 Nuvio
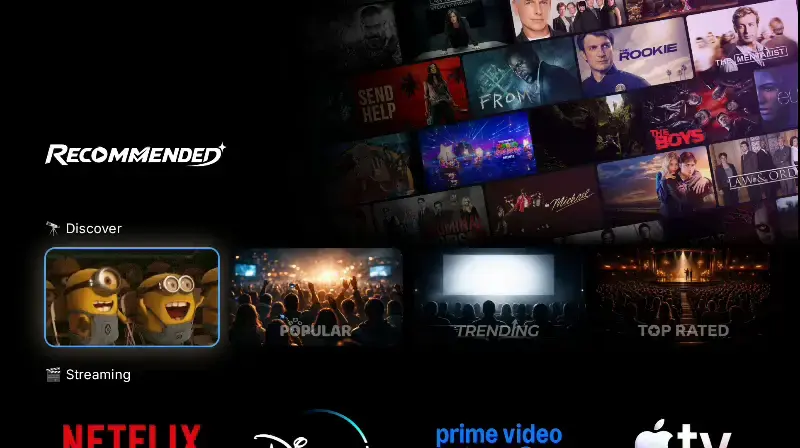
Nuvio is a new alternative streaming platform that supports the same Stremio addon ecosystem, but is more feature-rich and offers many additional customization options. It has its own account, profiles, collections, layout settings, and app experience. As such, you can configure AIOStreams, AIOMetadata, and optionally Watchly like before, but instead of installing those addons on Stremio, you will copy their Manifest URL and install them directly on Nuvio.
WORK IN PROGRESS:
- Nuvio is still in beta, so this page is currently a basic setup guide only.
- A full and more detailed Nuvio guide is coming once Nuvio is out of beta and the installation flow is more stable across platforms.
- For now, expect some parts to change, especially the app installation process, the available settings, and possibly how addon management works.
If you are a beginner and want to set up Nuvio from scratch, skip the 🚀 Collections chapter below and proceed with Nuvio Account Initialization. If you already know what you’re doing and only need the assets for the collections, check out the chapter below.
🍿 Collections
If you don’t want to follow the full setup above and only need the files, images, collections, or ready-made templates, this section is for you.
This includes:
- title logos,
- cover and focused images,
- backdrop images,
- SVG files,
- and the pre-configured JSON files.
Dynamic Backdrops
The collections also include Dynamic Backdrops, which are probably one of the coolest parts of this setup.
What this means is that the backdrop images for the included catalogs are not just static images that stay the same forever. Instead, they are regenerated regularly (currently once a month) based on the most current titles available inside the catalogs.
So, for example, if a streaming catalog, genre catalog, decade catalog, or theme catalog changes over time, the backdrop will also reflect its current titles automatically.
This works best if you use my AIOMetadata Catalogs catalogs and my Nuvio Collections directly from the repository, or if your own Nuvio collections point to the image URLs from my repo. This way, when the files are updated there, your setup can automatically benefit from the refreshed assets without you manually replacing images every time.
Assets
Here are the main files and resources:
- Collections Assets
- This contains all collection assets, title logos, cover, focused, backdrops, SVG files, and related resources.
- Use this if you want to browse, download, modify, or reuse individual assets.
- AIOMetadata Catalogs (JSON)
- Use this if you already have your own AIOMetadata setup and only want to import the catalogs in the Catalogs tab.
- This is useful if you don’t want to overwrite your full AIOMetadata configuration.
- AIOMetadata Full Configuration (JSON)
- Use this if you want the complete AIOMetadata configuration from this guide, import it in the Configuration tab.
- This is the easiest option if you are starting fresh or want the closest match to the setup described here.
- Nuvio Community Collections Pack
- This is the easiest way to add the collections pack directly through Nuvio.
- If you already followed the setup steps above, this is usually the simplest option.
- Nuvio Collections (JSON)
- This is the pre-configured collections file for Nuvio, the same used in the community pack above.
- You can import it manually into your Nuvio account, especially if you are using the matching AIOMetadata catalogs.
To give credit where it’s due, I used Tomato’s Cover Pack for the streaming services logos, and was inspired by user bramstone’s (from Discord) original script for generating the wonderful backdrops.
⚙️ 1. Nuvio Account Initialization
Let’s start by preparing your Nuvio account and app:
- Create an account on Nuvio.
- This will be the account that stores your Nuvio profiles, addon setup, collections, and app settings.
- Do not confuse this with your Stremio account. Nuvio uses its own account system.
- Install the Nuvio app for your platform as linked on the Nuvio homepage.
- IMPORTANT: Nuvio is not on all official app stores yet, so installation depends on your platform and may require sideloading or a manual install.
- *For Android and Android TV, it is already available on Play Store.
- If you are using Windows, iOS, Tizen, WebOS, or any other platform, the process may be different. This is one of the reasons this chapter is still marked as work in progress.
- Open the Nuvio app on your device.
- Log in to your Nuvio account through the QR Code shown in the app.
- The app should show you a QR Code or login flow that connects the device to your Nuvio account.
- After the login is complete, the app should be connected to the same account you created in the browser.
🧩 2. Configure Addons
Now we prepare the addons. You still follow the normal setup chapters for them, but on the final step you do not install them on Stremio. Instead, you copy the Manifest URLyou get in the end for each, because we will add that URL manually inside Nuvio.
- First, you need to follow the 📝 Accounts Preparation chapter to create the necessary accounts.
- Since the same addons are used, you still need a Debrid (optional), TMDB, TVDB and Gemini (optional) API Keys, and a Stremio and Trakt account (optional, but both needed especially if you want to use Watchly).
- Follow the 📚 AIOStreams chapter to configure AIOStreams (For HTTP users it’s optional but recommended, see next step).
- Do all the normal steps: import the template, select your services, enter your API keys, adjust preferences if needed, and save the configuration.
- IMPORTANT: On the final step, do not install it on Stremio.
- Instead, copy the final Manifest URL shown in the Save & Install tab. Store it somewhere temporarily, because you will paste it into Nuvio later.
- For 🌐 HTTP Users: Go here to choose the Plugins that are suitable for you and to learn how to install them on Nuvio.
- In addition to supporting Stremio addons, such as AIOStreams you installed above, which also includes HTTP sources that are properly filtered and formatted, Nuvio also supports Plugins, which can provide many additional HTTP sources. They don’t go through AIOStreams unfortunately, so you won’t get the optimized sources list like that addon does, but you would get additional stream sources. This is not necessary if you go for the P2P or Debrid configuration on AIOStreams above, but recommended for HTTP if you notice you are not getting enough streams from it.
- Follow the 🔎 AIOMetadata chapter to configure AIOMetadata.
- Again, do the normal setup: import the configuration, enter API keys, connect Trakt if you want, adjust catalogs if needed, and save the configuration.
- *Nuvio supports more catalogs than Stremio, so you can also enable the catalogs that come disabled initially, such as the Studio and/or Anime catalogs.
- IMPORTANT: On the final step, do not install it on Stremio.
- Instead, copy the final Manifest URL from AIOMetadata and store it together with the AIOStreams Manifest URL.
- Optional: Follow the 🤖 Personalized & Automated Lists chapter to configure Watchly, but use this instance instead of the one linked on that chapter.
- This step is optional, but I recommend it if you want personalized catalogs and more Netflix-like recommendations.
- IMPORTANT:
- Even if used with Nuvio, Watchly requires a Stremio account to configure your preferences, but you don’t have to use the account for anything else.
- The instance linked above is the development instance, which may be unstable. This is however currently needed for Nuvio (until the stable instance is updated), because the development version supports Trakt watch history to provide the personalized recommendations. This differs from the not yet updated stable version which uses Stremio watch history, which is obviously useless for Nuvio.
- Configure Watchly normally according to your preferences, and additionally connect it to Trakt as instructed in the settings.
- On the final step, do not install it on Stremio.
- Instead, copy the final Manifest URL for Watchly and store it too.
- If you do not want to use Watchly, you can simply skip it and only install AIOMetadata and AIOStreams in Nuvio.
➕ 3. Install Addons
Once you have the Manifest URLs ready, go back to Nuvio in your browser:
- Open nuvioapp.space.
- Go to your Account section.
- If you have more than one profile, make sure the profile you want to configure is selected from the top header menu.
- This is important because addons and collections can be profile-specific. If you configure the wrong profile, you may open the app later and think nothing worked, even though you simply added everything to another profile.
- Click on Addons.
- Remove any existing addons if you want a clean setup.
- This is optional, but recommended if you are starting fresh.
- At the very least, I recommend removing Cinemeta, because the whole point of this setup is to let AIOMetadata handle metadata and catalogs instead.
- If you already have addons you intentionally want to keep, then you can keep them, but for beginners a clean setup is usually easier to troubleshoot.
- Click on Add Addon.
- Paste the first Manifest URL into the addon URL field.
- Leave the Enabled toggle selected.
- Leave the Name field empty.
- Nuvio should autofill the addon name automatically from the manifest, so you normally don’t need to type anything here.
- Press Save.
- Repeat the same process for each addon.
- Ideally, add them directly in this order:
- Watchly (optional)
- AIOMetadata
- AIOStreams
🍿 4. Collections Pack
Now let’s add the collections pack that organizes the installed AIOMetadata catalogs together into the groups described in 🔎 AIOMetadata:
- Go to this Nuvio Collections Pack.
- Click Add Pack.
- Make sure the correct profile is selected.
- Again, if you have more than one profile, double-check this. Otherwise you may install the pack on the wrong profile.
- Under Install Mode, choose the option you prefer.
- Merge by matching IDs is usually the safest option if you already have some collections and want to keep them.
- Replace profile collections is probably the cleanest option if your Nuvio account is new and you do not have existing collections you care about.
- If you are starting fresh, I would suggest choosing Replace profile collections, because it gives you a cleaner result and avoids duplicate or messy rows.
- Click Add Pack/Merge Pack/Replace Profile, depending on the mode you selected.
- The exact button name may change depending on the install mode.
🛠️ 5. App Settings
Lastly, open the Nuvio app and adjust a few settings to make the setup behave properly:
- Open the Addons tab.
- Go to Reorder home catalogs and enable the Follow addons order toggle.
- This keeps the catalog order consistent with the order configured in the addons for them, avoiding any confusion.
- Go to Settings.
- Go to the Trakt tab and follow the steps to integrate your Trakt account.
- This is recommended if you want watch history, progress, and recommendations to work better across the setup. If you do not use Trakt, you can skip this, but some personalization features may be less useful.
- Go to Layout, Detail Page, and enable the Prefer meta from external addon toggle.
- This tells Nuvio to prefer the metadata coming from your external metadata addon, which in this setup is AIOMetadata.
- Go to Integrations, then TMDB.
- Enable all toggles in the TMDB integration section.
- This helps Nuvio use all TMDB-related features across the interface.
- Configure the rest of the settings however you like.
That’s it! If everything was added in the right order and the settings were enabled correctly, you should now have a perfect Nuvio setup. Enjoy 😊
NOTES FOR LATER:
- If something does not show correctly, first check that you configured the correct Nuvio profile from the top header menu.
- If streams do not show, check that AIOStreams was added and enabled.
- If catalogs or metadata look wrong, check that AIOMetadata was added, enabled, and that Prefer External Metadata is enabled in the Nuvio app.
- If Watchly catalogs are empty at first, don’t panic. If your account is new, it may need some watch history before recommendations become useful.
- Because Nuvio is still in beta, some UI names or buttons may change. The general logic should remain the same: create account, install app, copy addon manifests, add addons to the correct profile, add the collection pack, then enable the final app settings.